Streaming videos in the terminal part 1: building a MVP
Published on: June 15, 2025
15 min read
Streaming YouTube videos in the terminal with the Kitty graphics protocol
Over the past few months, I have been slowly turning my terminal into my happy place: switching from VSCode to Neovim, setting up Neomutt to read my emails, even occasionally using lynx to browse some text-heavy websites. I could even find CLI clients for a lot of other common desktop apps, like Spotify or Discord. But when it came to YouTube, and video streaming in general, I was still reliant on my regular browser.
That is, until I read the following line in the documentation for Ghostty:
Kitty graphics protocol: Ghostty supports the Kitty graphics protocol, which allows terminal applications to render images directly in the terminal.
It then dawned on me: if my terminal could display images, it could display video. My dream of reaching 100% terminal-dwelling time was within my grasp. All I needed was caffeine, a LLM holding my hand, and a few hundred lines of poorly written Rust code.
In this article, we’ll explore how to build a feature-poor, blazingly slow, low-quality, heavyweight terminal video streaming program in Rust, using yt-dlp, FFmpeg and the Kitty graphics protocol:
- yt-dlp is an awesome open-source project to download YouTube videos (as well as many other sites);
- FFmpeg allows us to convert the output of
yt-dlpto RGB format, without having to worry about the original video format; - The Kitty graphics protocol determines how we can display images in our terminal.
So what is the Kitty graphics protocol?
The Kitty graphics protocol is a specification allowing client programs (like the one we are going to build) to display images using RBG, RGBA or PNG format inside a terminal emulator. While initially developed for Kitty, it has been implemented in other terminals like Ghostty and WezTerm. All our program has to do is send graphics escape codes to STDOUT with the right escape characters and encoding.
So what does that look like? The specification tells us that escape graphics code follow this pattern:
<ESC>_G<control data>;<payload><ESC>\
The <ESC>_G prefix and the <ESC>\ suffix are the delimiters to let the terminal know where our image data starts and ends. The two interesting parts in this sequence are the control_data and the payload.
Control data
The control data is a series of comma-separated key-value pairs. It includes some metadata about the image, such as its format, width or height, as well as some instructions for the terminal on how to display the image. You can find a full reference here.
For instance, if we need to display some basic RGB data, we can use the following control data:
<ESC>_Gf=24,s=<image width>,v=<image height>,a=T;<payload><ESC>\In this example, the f, s and v keys are the image metadata. f=24 is for RGB format, s and v are for the image width and height respectively. The a key is the action to execute: a=T tells the terminal we want it to display the image.
Payload
The payload is the actual image data, encoded in base 64. It can be either a file path or the raw image data. The t key in the control data can be used to tell the terminal whether we’re sending raw data or a file path.
# Sending the RGB data directly in the payload
<ESC>_Gf=24,s=<image width>,v=<image height>,a=T,t=d;<base64_encoded_pixels><ESC>\

# Sending the path to a file containing RGB data
<ESC>_Gf=24,s=<image width>,v=<image height>,a=T;t=f<base64_encoded_file_path><ESC>\

# Sending the path to a PNG file; width and height are not necessary as they will be in the PNG metadata
<ESC>_Gf=100,a=T;t=f<base64_encoded_file_path><ESC>\
High-level plan
Since we are setting out to stream YouTube videos, we don’t want to download a video, then encode all its frames into graphics escape codes, and then display it. We want to do all this in parallel, which means we are going to need some multi-threading (a hard concept to grasp for my smooth Typescript brain).
We can expect that our threads will require some CPU resources at the same time: if we want to watch any video that is over a couple seconds long, we should start displaying frames while we are still downloading and encoding the next ones. For this reason, I did not see much value in using an async runtime, and simply used Rust’s std::thread.
This is how we can get a simple download -> encode -> display flow:
- We build two queues: a ‘RGB frames queue’ to store the raw RGB frames before we’ve encoded them to follow the graphics protocol, and a ‘escape codes queue’ to store the graphics escape codes ready to be sent to
STDOUT; - One ‘download thread’ fetches data from YouTube, converts it to RGB format, and stores it in the RGB frames queue (this is the thread that will use
yt-dlpandFFmpeg); - An ‘encode thread’ pops frames from the RGB frames queue, converts it to the graphics escape code to display, and stores it in the escape codes queue;
- A ‘display thread’ pops escape codes from the queue and sends them to
STDOUTat the right interval to maintain the original frame rate.
The flow of data in our program should look something like this:

Getting video data for a YouTube video with yt-dlp and ffmpeg
Step one is to get our download thread to download data from YouTube, and store it in RGB format in the RGB frames queue. Considering the variety of existing video formats, the complexity of codecs, containers and of the YouTube API, I personally cowardly decided to rely on the superior programmers at yt-dlp and FFmpeg to provide me a stream of RGB frames.
First, we need to decide on a width and height for the frames we want to display. I initally tried a 720p resolution, but it seemed my program was not able to display 720p frames at 25 FPS. The average FPS was around 15-20. So I pretended it was 2010 and went with 360p (i.e. 360 * 640), to avoid these performance issues. We can then know the size of each RGB frame (360 * 640 * 3 bytes per pixel = 691200 bytes of RGB data per frame in my case). Then, we can set up yt-dlp and FFmpeg piped together to provide us with a stream of RGB frames downloaded from YouTube:
- we start
yt-dlpfor our favorite video, selecting a 360p format and outputting the result toSTDOUT; - pipe the
yt-dlpoutput toFFmpeg; - kindly ask
FFmpegto convert the data to RGB and output it toSTDOUT
We can then read the FFmpeg output, split it in 691kB chunks, and store each chunk to our RGB frames queue.
This is what the function handling this pipeline looks like
    pub fn stream(&self) -> Res<()> {
        let frame_size = self.width * self.height * 3;
        let mut yt_dlp_process = Command::new("yt-dlp")
            .args([
                "-o",
                "-",
                "--no-part",
                "-f",
                format!("bestvideo[height={}][width={}]", self.height, self.width).as_str(),
                &self.url,
            ])
            .stderr(Stdio::null())
            .stdout(Stdio::piped())
            .spawn()
            .expect("Could not start yt-dlp process");

        let yt_dlp_stdout = yt_dlp_process.stdout.take().unwrap();

        let mut ffmpeg_process = Command::new("ffmpeg")
            .args(["-i", "pipe:0", "-f", "rawvideo", "-pix_fmt", "rgb24", "-"])
            .stdin(Stdio::from(yt_dlp_stdout))
            .stderr(Stdio::null())
            .stdout(Stdio::piped())
            .spawn()
            .expect("Could not start ffmpeg process");

        let mut ffmpeg_stdout = ffmpeg_process
            .stdout
            .take()
            .expect("Failed to get ffmpeg stdout");

        let mut accumulated_data = Vec::new();

        let mut read_buffer = vec![0u8; frame_size];

        loop {
            match ffmpeg_stdout.read(&mut read_buffer) {
                Ok(0) => {
                    self.streaming_done_tx.send(()).unwrap();
                    break;
                }
                Ok(bytes_read) => {
                    accumulated_data.extend_from_slice(&read_buffer[0..bytes_read]);

                    while accumulated_data.len() >= frame_size {
                        let frame_data = accumulated_data.drain(0..frame_size).collect::<Vec<u8>>();
                        let frame = Frame::new(frame_data);

                        self.rgb_buffer.lock().unwrap().push_el(frame);
                    }
                }
                Err(e) => {
                    eprintln!("Error reading from ffmpeg: {}", e);
                    break;
                }
            }
        }

        if !accumulated_data.is_empty() {
            println!("Leftover incomplete data: {} bytes", accumulated_data.len());
        }

        let _ = ffmpeg_process.wait();
        let _ = yt_dlp_process.wait();
        Ok(())
    }
Encoding frames to be displayed
Now that we have a queue of RGB frames, we need our encode thread to convert them to graphics escape codes matching the Kitty graphics protocol. So we need the right control data (which will be the same in every escape code), and we need to encode the RGB data of each frame in base64.
Here are the control data key-value pairs that we need to display one of our frames, i.e. a 640x360 pixels image:
f=24: to signal that we are sending RGB data;s=640: the height of the image;v=360: the width of the image;t=d: to signal that the image data will be directly in the payload;a=T: to instruct the terminal to display the frame when received.
Once we have this control data, we simply need to repeat the same few steps for each frame:
- read the RGB data from our RGB frames queue;
- encode it in base 64 (I used the base64 crate)
- return a slice with the encode prefix (
<ESC>_G), our control data, the base 64 encoded data, and the suffix (<ESC>\) - store this slice in our escape codes queue, ready for display;
This is what my encoding functions look like
fn encode_frame(&self, encoded_control_data: Vec<u8>, frame: Vec<u8>) -> Vec<u8> {
    let encoded_payload = self.encode_rgb(frame);
    let prefix = b"\x1b_G";
    let suffix = b"\x1b\\";
    let delimiter = b";";
    let mut buffer = vec![];
    buffer.extend_from_slice(prefix);
    buffer.extend_from_slice(&encoded_control_data);
    buffer.extend_from_slice(delimiter);
    buffer.extend_from_slice(&encoded_payload);
    buffer.extend_from_slice(suffix);
    buffer
}

pub fn encode(&mut self) -> Res<()> {
    loop {
        let mut rgb_buffer = self.rgb_buffer.lock().unwrap();
        let x_offset = (self.term_width as usize - self.width) / 2;
        let y_offset = (self.term_height as usize - self.height) / 2;
        let encoded_control_data = self.encode_control_data(HashMap::from([
            ("f".into(), "24".into()),
            ("s".into(), format!("{}", self.width)),
            ("v".into(), format!("{}", self.height)),
            ("t".into(), "d".into()),
            ("a".into(), "T".into()),
            ("X".into(), format!("{}", x_offset)),
            ("Y".into(), format!("{}", y_offset)),
        ]));
        let frame = rgb_buffer.get_el();
        if let Some(frame) = frame {
            let encoded_frame = self.encode_frame(encoded_control_data, frame);
            let mut encoded_buffer = self.encoded_buffer.lock().unwrap();
            encoded_buffer.push_el(encoded_frame);
        } else if self.streaming_done_rx.try_recv().is_ok() {
            self.encoding_done_tx.send(()).unwrap();
            return Ok(());
        }
    }
}
fn encode_control_data(&self, control_data: HashMap<String, String>) -> Vec<u8> {
    let mut encoded_data = Vec::new();
    for (key, value) in control_data {
        encoded_data.push(format!("{}={}", key, value));
    }
    encoded_data.join(",").as_bytes().to_vec()
}

fn encode_rgb(&self, rgb: Vec<u8>) -> Vec<u8> {
    let encoded = general_purpose::STANDARD.encode(&rgb);
    encoded.as_bytes().to_vec()
}
Managing the frame rate
To display a frame, all we need to do is write the graphics escape code to STDOUT. Our yt-dlp + FFmpeg flow already gives us the frames in the right order, so we don’t need to worry about ordering. We do however need to take care of frame rate. In all formats I have seen, 360p YouTube videos have a 25 FPS frame rate, meaning we have to display one frame every 1000 / 25 = 40 ms.
Because displaying the frame takes a non-negligible time, we can’t simply make the thread sleep after each frame. Instead, we can measure the time since the last displayed frame, and only display the new one if the elapsed time since the last frame is over 40 ms.
let mut last_frame_time = std::time::instant::now();
loop {
    // we only get a frame if over 40 ms have passed since the last one
    if last_frame_time.elapsed() >= self.frame_interval {
        let encoded_frame = self.encoded_buffer.lock().unwrap().get_el();
        if let some(frame) = encoded_frame {
            last_frame_time = std::time::instant::now();
            self.display_frame(frame)?;
        }
    }
}
I initially thought this would be enough, but I ended up running into a bug where the frame rate would drop significantly below 25 fps. I added logs to different stages of the program, and realized that the loop inside the display sometimes took over 40 ms, so the video would lag behind.
To fix this, we can add a frame skipping check. If we read a frame and the last frame was displayed over 42 ms ago, we skip the current frame and move on to the next one. This is a bit of a hacky fix, but this is my project and I say it’s fine.
My implementation, including the frame skipping, looks like this
pub fn display(&self) -> Res<()> {
let mut last_frame_time = std::time::Instant::now();
let mut total_frames_counter = 0;
loop {
if self.encoded_buffer.lock().unwrap().len() == 0 {
if self.video_queueing_done_rx.try_recv().is_ok() {
return Ok(());
}
} else if last_frame_time.elapsed() >= self.frame_interval {
let encoded_frame = self.encoded_buffer.lock().unwrap().get_el();
if let Some(frame) = encoded_frame {
// if over 42 ms have passed since the last frame, we skip the current frame
if total_frames_counter > 0
&& last_frame_time.elapsed()
> self.frame_interval + Duration::from_millis(2)
{
last_frame_time += self.frame_interval;
total_frames_counter += 1;
continue;
}
last_frame_time = std::time::Instant::now();
total_frames_counter += 1;
self.display_frame(frame)?;
}
}
}
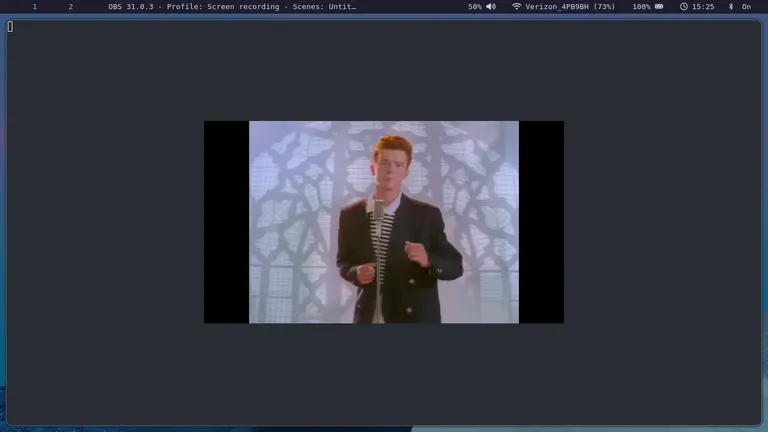
}Improving the display
At this stage, running my program would ‘work’. It would play the video I wanted, albeit with pretty low quality and frame rate, in my terminal. However, the video would play over my regular terminal, and I could still see my logs behind the image. I could also see my cursor on the bottom right of the image.
So I added a few display improvements to make the viewing experience slightly more bearable.
First, I added an escape code right before every frame:
let reset_cursor = b"\x1B[H";Sending this before every frame ensure my cursor was always at the top left, which also helped keep frame positioning consistent.
Second, I moved the video to the terminal’s alternate screen, so it wouldn’t conflict with logs. To make sure that the alternate screen would be toggled at the start of the program and reset at the end, I added a dedicated ScreenGuard struct, which starts the alternate screen when created and resets it when dropped. I could then create an instance of the struct at the beginning of main, and be sure that it would be dropped at the end of the function.
pub struct ScreenGuard {}

impl ScreenGuard {
    pub fn new() -> Res<Self> {
        let mut stdout = std::io::stdout();
        let alternate_screen = b"\x1B[?1049h";

        stdout.write_all(alternate_screen)?;
        stdout.flush()?;
        Ok(ScreenGuard {})
    }
}

impl Drop for ScreenGuard {
    fn drop(&mut self) {
        let mut stdout = std::io::stdout();

        let mut buffer = vec![];
        let reset = b"\x1B[?1049l";
        let clear = b"\x1b[2J";
        let cursor = b"\x1b[H";
        buffer.extend_from_slice(reset);
        buffer.extend_from_slice(clear);
        buffer.extend_from_slice(cursor);

        stdout.write_all(&buffer).unwrap();
        stdout.flush().unwrap();
    }
}
Finally, I wanted to center the video frame in the terminal. Following the Kitty graphics protocol documentation, I used an IOCTL system call to get the terminal’s window size, and used it to add an offset in the control data that we used in the graphics escape codes.
// I would like to thank Claude for writing this function for me
fn get_terminal_size() -> std::io::Result<(u16, u16)> {
    let mut winsize: libc::winsize = unsafe { mem::zeroed() };
    let result = unsafe { libc::ioctl(libc::STDOUT_FILENO, libc::TIOCGWINSZ, &mut winsize) };
    if result == -1 {
        return Err(std::io::Error::last_os_error());
    }
    Ok((winsize.ws_xpixel, winsize.ws_ypixel))
}
We now have a YouTube video player, right in our terminal! How about adding sound?
Getting audio data
First, we need to get audio data. Luckily, we can just repeat the same yt-dlp - FFmpeg flow that we add for video, with different params. This time, instead of asking FFmpeg to output RGB data, we can specifiy an audio sample format. I went with a 48kHz frequency stereo format, meaning a one-second sample would be 48000 * 2 * 2 = 192 KB.
Initially, I tried setting FFmpeg to directly output to PulseAudio. While this did work to play the sound of the video, it would not guarantee that 1) both the audio and the video would start simultaneously, and 2) one stream will pause if the other is buffering.
To fix the first problem, I replicated the queueing strategy I implemented for video, by storing the audio samples in a queue.
Synchronizing audio and video
To fix the second issue and ensure that our audio and video stay in sync, I added another layer of buffer. This would be two ‘ready to play’ queues, in which I would move the graphics escape codes and audio samples only when one second of both is ready. Thus, both of these queues would always contain the same amount (i.e. the same number of seconds) of content. I could then read from these queues when I needed to send data to either the terminal or audio pulse.
If either stream fell behind, both of these ‘ready to play’ queues would stop being filled, and both the audio and video outputs would stop and restart at the same time.
The final flow of our program now looks like this:

Shutting down the program at the end of the video
Finally, we need to shut down all our threads as we finish receiving, processing and outputting data. The easiest way I thought of was to create channels that upstream threads could use to signal downstream threads when done:
- The download threads responsible for starting the
yt-dlpandFFmpegprocesses signal they’re done when both subprocesses are done and they’ve stored the leftover data in the first queues; - The thread responsible for creating graphics escape codes shuts down when the upstream thread is done and the RGB data queue is empty (meaning all frames have been encoded into graphics escape codes);
- The thread that fills the ‘ready to play’ queue shuts down when the encoding thread is done, the audio receiving thread is done, and both of the corresponding queues are empty;
- The overall program shuts down when the ‘ready to play’ queues are empty and the thread filling them is done as well.
Next steps
You can find the full source code here. This article covers the program as it was in release 1.0.0.
Bugs and possible improvements:
- As expected from a toy project, our program is currently not very efficient. In particular, we currently start 4 sub-processes: two
yt-dlpsub-processes and twoFFmpegsub-processes. I am currently working on fixing this by implementing a demultiplexer, and might write about it in another post; - Downloading the data from YouTube and decoding it to RGB with
FFmpegis much faster than our display framerate. This means that our RGB queue grows larger and larger as we download the video and haven’t displayed those frames yet. As you can see on the chart below, our program’s memory usage grows significantly at first, until the download is down and the display catches up. If we were to play a long enough video, we might even cause out of memory errors.
CHART TBD